How to Install Actions for Photopea (Photopea.com)
FollowAt Luxe, we're all about offering solutions that are kind to creative budgets. While we aim to offer pro-quality Photoshop and Lightroom resources at a great price, we know not everyone has access to Adobe Software. We've found a cult favorite free-editor in Photopea: a free in-browser photo-editor that supports many of the same editing features of Adobe's Photoshop or the Gimp desktop software, but in a snappy easy-to-use format that loads whip-quick and is optimal for quick fixes on the fly.
Photopea.com can read actions created for the Photopea (Photoshop & Elements actions utilize features not present in Photopea so PS & Elements actions will NOT work in Photopea). These actions load via "File > Open" and the Photopea.com gives you the option to store these files locally so you can see them every time you visit Photopea from the same device.
We recommend having a Photopea account, and backing up your Photopea .atn file(s) to a secure cloud or external hard storage device, so you can quickly load and use them on the fly.
To begin, download your Photopea actions from the secure download link you received via email at time of purchase.
To Install your Photopea Actions:
1. Navigate to Photopea.com
2. Open your image
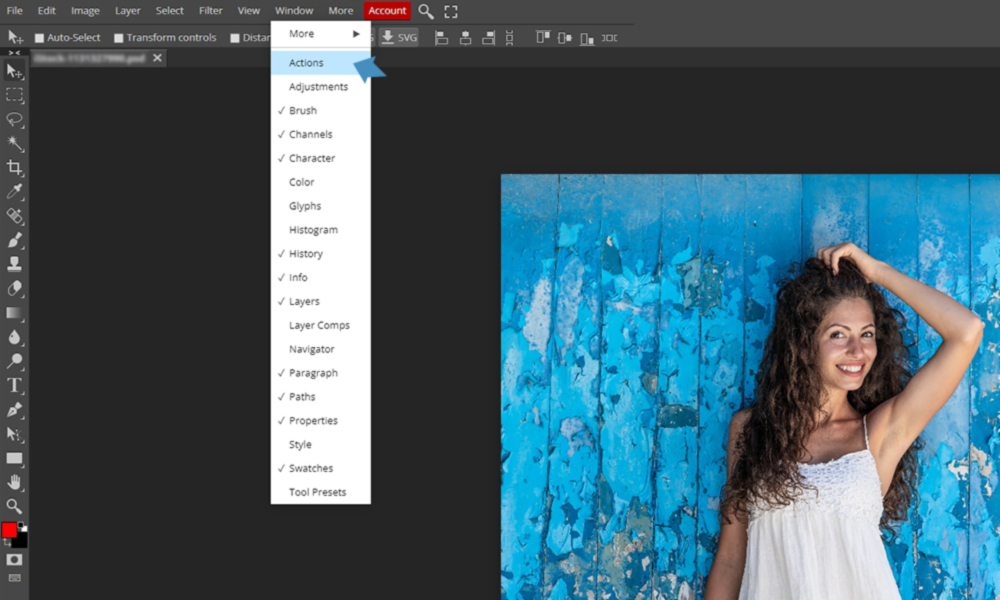
3. To view the Actions window in Photopea simply navigate to Window > Actions:

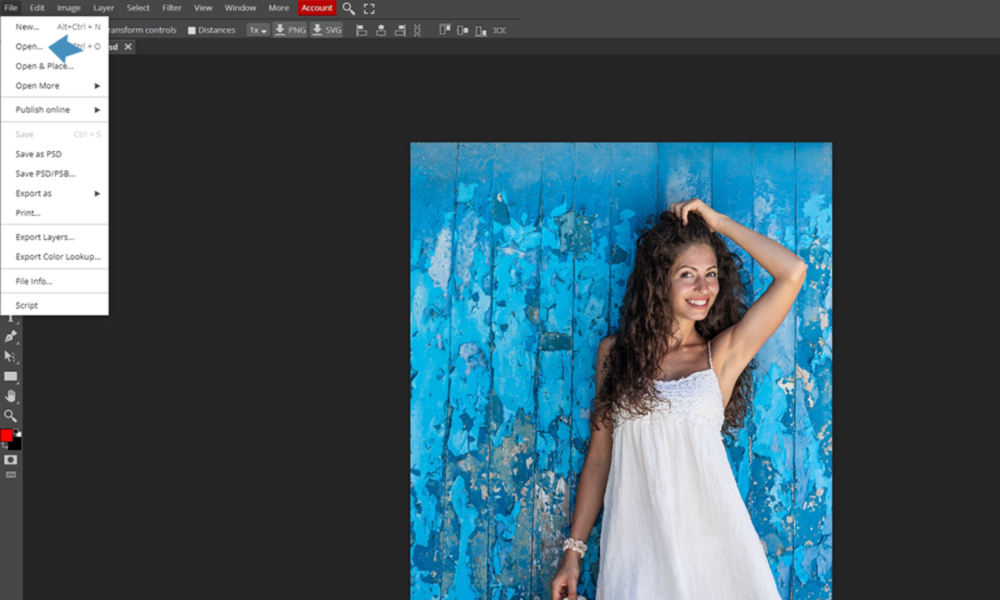
4. To Import, Navigate to "File" > "Open...":

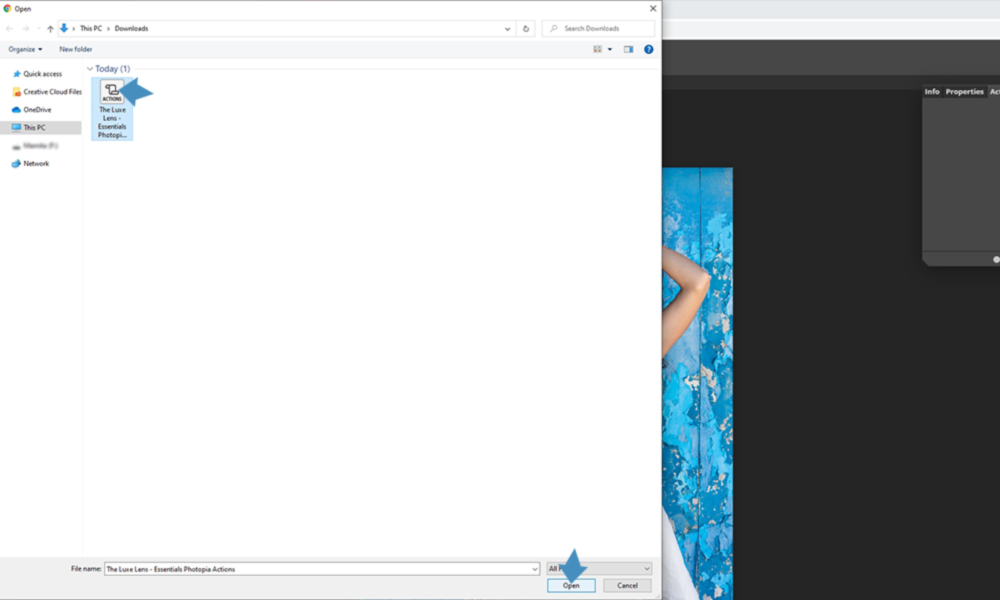
5. Locate your newly downloaded .atn file & double-click or select & click "Open" to import:

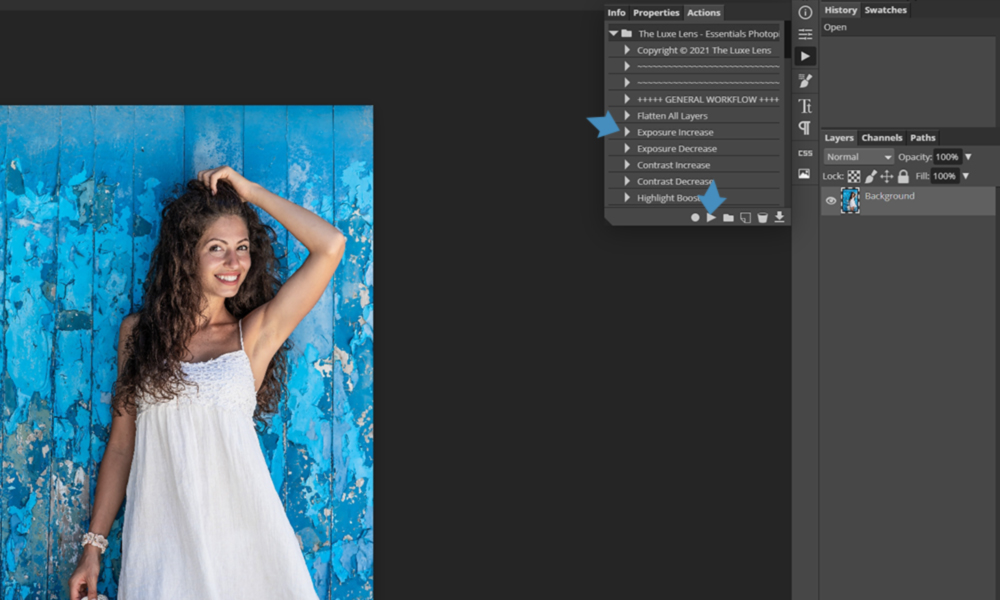
6. To apply an action, select your desired action & click on the play button at the bottom of the actions window:

Recommended Workflow: Make "General Workflow" adjustments first, then apply a stylistic "Color Base" or "Monochrome" edit, and then apply optional "Color Overlays". (Adjust opacity and blend each new action layer as needed).
Photopea will jump to "Properties" after an action is applied. While you can adjust the properties of the adjustment layer applied by the action you selected (such as adjusting the curves or the color overlay) here, we recommend bouncing back to the Actions tab to apply the next action, or head over to the layers panel to adjust the opacity, blend mode, or mask of the action layers.