How to use Actions in Photoshop & Elements
FollowSo you are in Photoshop and you've just installed your new actions, and you want to learn how to use them, right? There's no better way than jumping right in! But no worries, we're here to help!
First, make sure that you've followed the correct installation instructions for Photoshop or Elements, and that you haven't purchased presets for ACR instead.
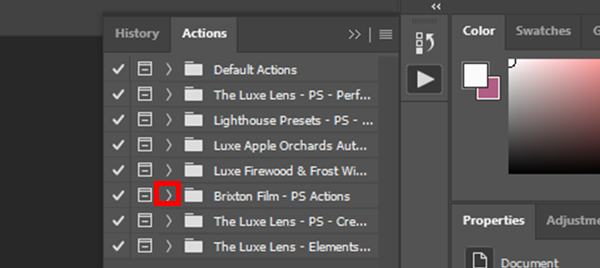
Once you are sure that you have your actions installed properly, simply load and image and open up your Actions window (If it closes for any reason you can always bring it back up via Windows > Actions from your top toolbar).

With your actions window open, and your newly installed Luxe actions visible, simply follow these easy steps:
- Select the arrow next to the title of your actions collection to view all actions in the collection.

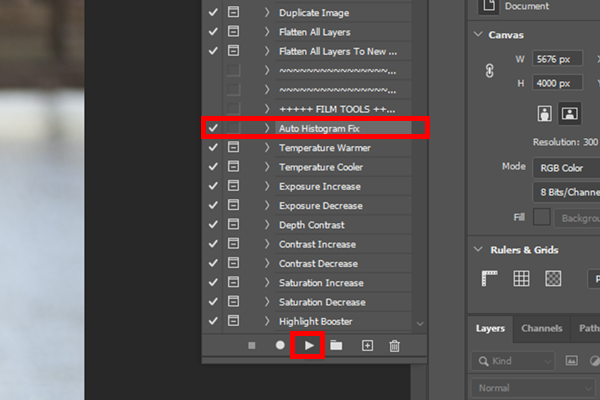
- Select the action that you would like to apply.
- Navigate to the play button (Bottom of panel in Photoshop, Top of panel in Elements).
- Click on the play button and wait for the action to complete.

- Repeat with as many actions as you'd like.
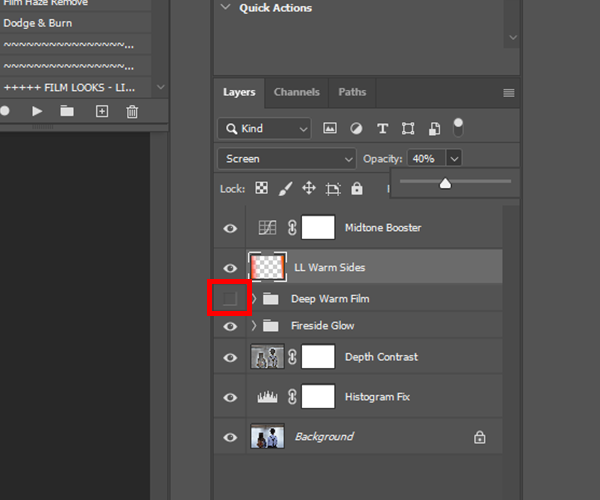
- Once you have applied your actions, they will appear as layers. You can toggle the visibility "eyeball" next to each layer to see your images before/after the applied action.

To make things easier, our actions are designed in the order of a typical workflow from the top down. With layer flattening (in the case that you have multiple layers at the outset), and several basic adjustments (for light and color correcting) at the outset, leading into vibrant themed global general toning actions, special effects, and finally whole photo sharpening.
For more info on how to modify the effect of a Photoshop Action, CLICK HERE.